

ONE TEENSY CHANGE A WEEK IN YOUR INBOX.
TRY THE FREE NEWSLETTER
ONE TEENSY CHANGE
A WEEK IN YOUR INBOX.


How to Start a Parenting Blog in Three Easy Steps
 I totally get it. You spend your days making adorable DIYs with your kids and your friends keep telling you other moms would LOVE to see your ideas (yes, they would!). Or you have the cutest kids ever and want to share them with the world. Or maybe you just want to connect with other parents who are in the same space as you and find themselves humming the Octonauts theme song at inappropriate moments.
You should totally start a parenting blog.
Now, when I started my blog, I made it HARD. I hired a designer and developer and created a million obstacles (which is a whole other blog post) and wasted a ton of time and money because I was terrified and kind of a dummy. Learn from me.
It doesn’t need to be that way.
You can have a blog that looks professional and let’s you start blogging within the hour. So, give the kids the iPad (not that I would ever do that) and take the next 30 minutes and get your blog going!
HOW TO START A PARENTING BLOG IN THREE EASY STEPS
- Register your domain name and set up hosting.
- Upload your WordPress.
- Beautify it.
Before we dive in, I want to explain why I chose Blue Host. I’ve used a bunch of hosting places – namecheap, GoDaddy, Host Gator, SquareSpace, even local hosting on a developer’s server, and they’ve all been imperfect. I currently use WP Engine, because I was hacked while on Host Gator and had to hire a guy to put my site back together (so frustrating) and he recommended WP Engine because they specialize in WordPress hosting and automatically upgrade your site (the reason they think I was hacked) and make everything really easy. And, I love them and would highly recommend them, but they’re pretty expensive if you’re starting out (plans start at $29/month) and probably more than you need. If you know blogging is what you want to do though and are in it for the long haul, I can’t recommend them enough.
Right now, though, I have another site I’m thinking about launching and don’t want to invest a lot until I know what I’m doing with it so I needed something less expensive. I kept hearing about Blue Host so I thought I’d give them a try – so far, I really like and them and am optimistic!
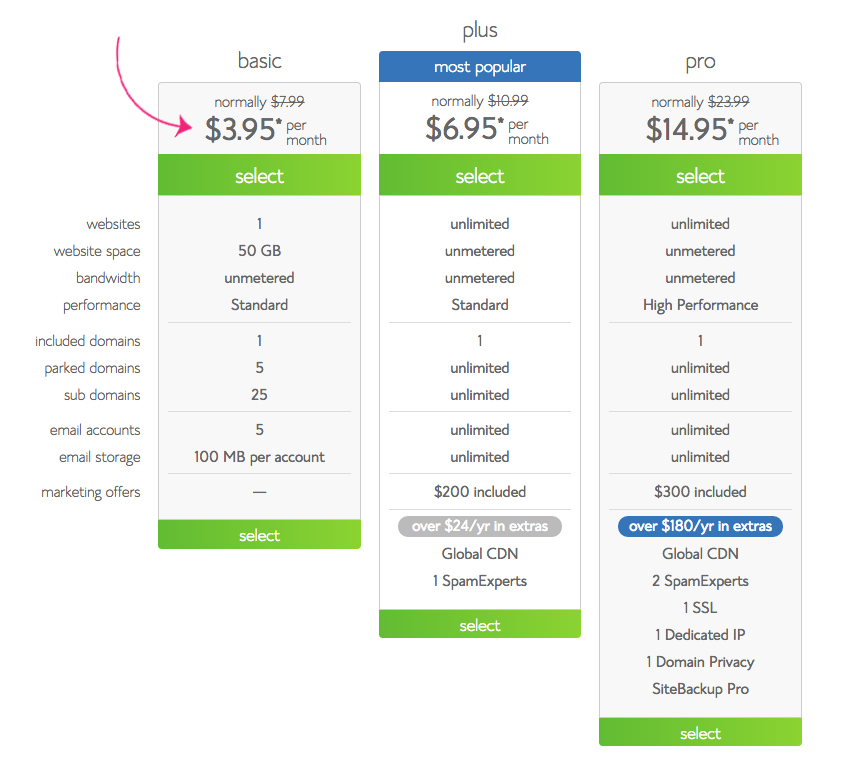
First, they make it incredibly easy to get set up on WordPress in literal minutes. Like “you don’t have to know anything” easy, which is what we all want, because you should be writing and posting photos, not trying to figure out what the hell a cname is. Their plans start at $3.95/month, which feels totally doable (although to get that rate you have to pay for three years upfront). And I’ve contacted their support twice now for random reasons and both times they were super-helpful and walked me through solving my problem.
I will definitely keep you updated on my experience with them, but since this is all about getting everything up and going quickly, and they do that incredibly well, I say Blue Host it is! (If you have another hosting service you love, please let me know as I’m always interested in what’s out there.)
Okay, enough back story. Here’s how to get you up and going!
STEP 1: Register your domain name and set up hosting.
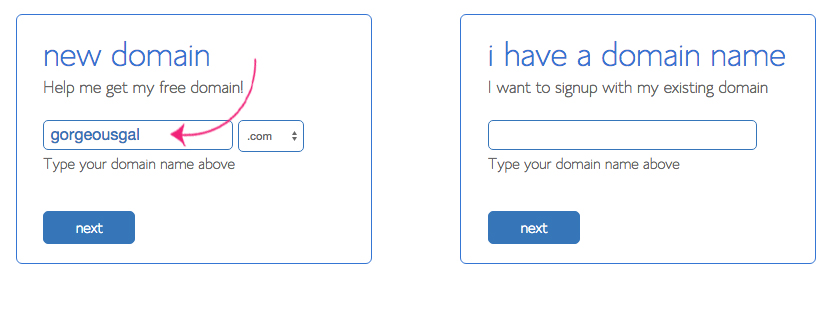
The first thing you need to do is come up with a name for your blog. I recommend doing an epic brainstorming session where you write down what your blog will be about (easy DIYs, parenting tips, Mom style, etc) and then write down every single thing you can think that relates to it (for example, easy DIYS: fast, simple, short, DIY, kid fun, kids with scissors, mom break, etc). Typically, something will emerge that sums up what you’re aiming for.
Alternatively, if you’re not 100% sure what you’ll be focusing on, use your name (marieforleo.com, for example) or something you’re known for (that’s how Fabulistas came about – I call everything “fabulous” and it eventually evolved into calling myself a “fabulista”). Or if there’s a word you love but that domain is taken, you can always add “blog” to the end (my friend did this with her blog, goodappleblog.com).
Once you have a bunch of ideas, go over to Blue Host, and see if any of them are available, by entering it into the box. Don’t give up! I know this part can be kind of frustrating (everything good is taken!), but if you persevere you’ll come up with something. Just don’t let this be a huge stopping point, because you can always rebrand later if you really, really hate it.
To get to this page on Blue Host, you’ll have to choose a plan under the “Products -> Shared Hosting” tab. Personally, I think the Basic is perfect when you’re starting out – don’t spend more time or money than you have to while you’re figuring things out, right? (Just a note, to get the $3.95 rate you have to prepay for 36 months.)
You’ll then go through and enter all of your info and they’ll give you an option for add ons. The only one I would think about after my terrible hacking experience is the Site Backup, where they automatically back up your site for you. There are WordPress Plugins that will do the same thing, but since we’re making this as easy as possible, why not let them handle it? That way, if something does happen, you have peace of mind and can get your site back up and running quickly. 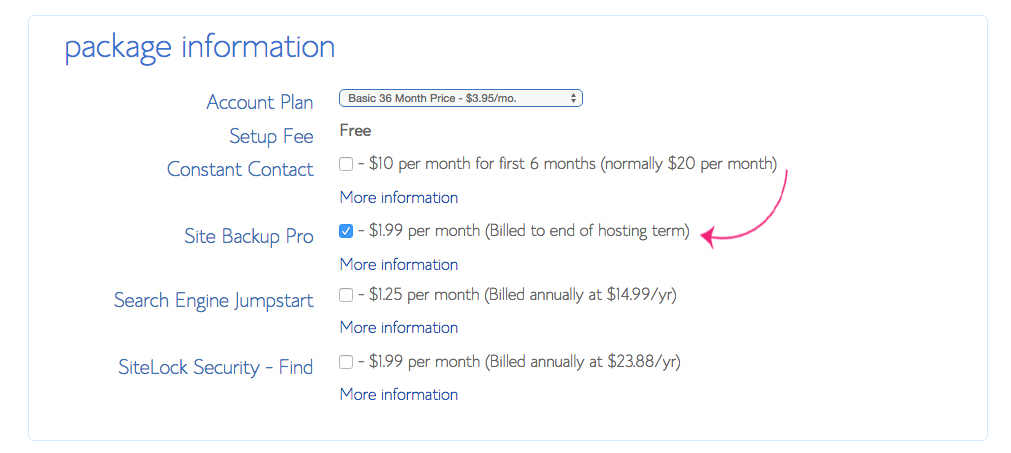
And now you’re all hosted!
STEP 2: Install WordPress.
Here’s where I think Blue Host really shines – it, basically, does all the work for you (just for context: you used to have to either pay someone to do this or download it and go into your cPanel and figure out how to upload it).
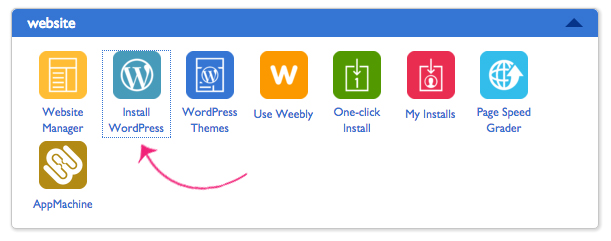
Once you’ve put in your credit card info, it sends you to your dashboard, which has the very helpful “Install WordPress” icon. Click on this.
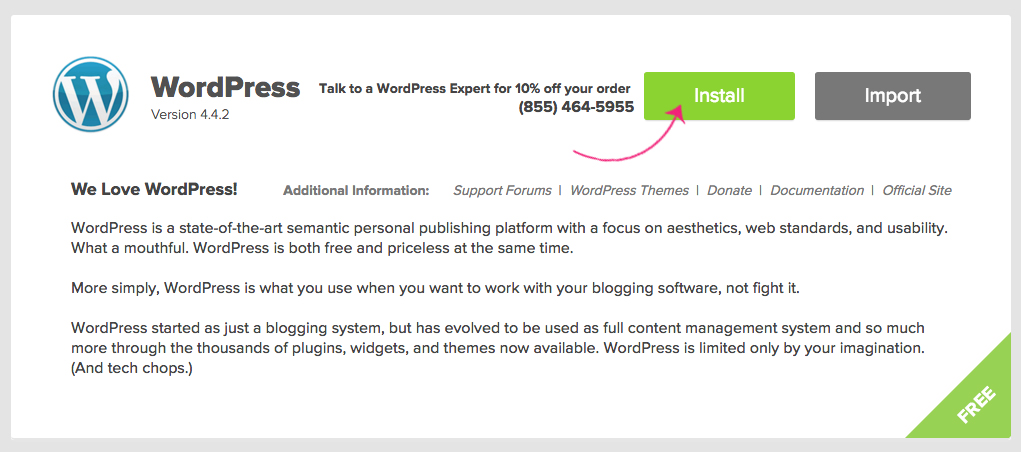
It will then take you to this page where, well, I think you can probably figure out what to do.
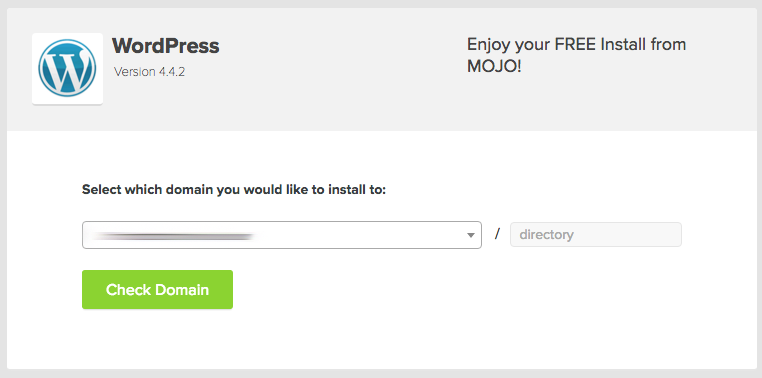
 From there, choose the domain you’d like to install to (there will most likely only be one) and hit “Check Domain.”
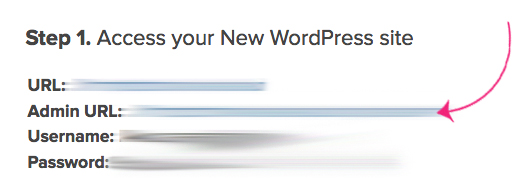
It takes a couple of minutes, but once it’s all installed you’ll see this banner at the top. WOO HOO! You’re installed! Click on the “View Credentials” button.

This will take you to your Notification Center (I know this feels like a lot of steps, but it’s easy when you’re in it, I promise) where you will want to click “View.” 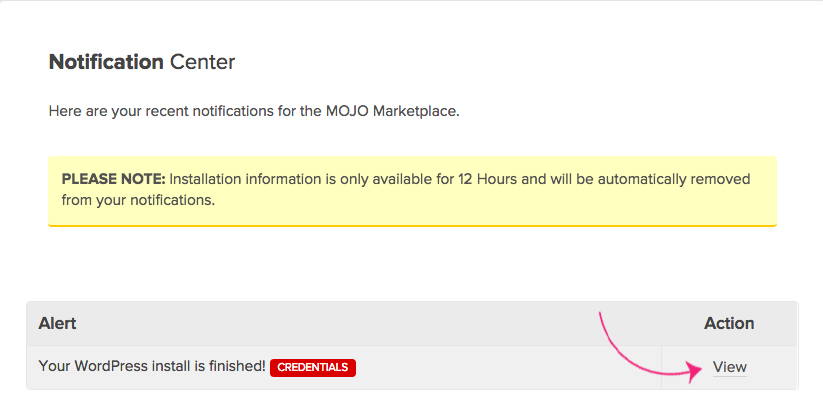
Now, you’ve got the important deets. Click on your Admin URL, which will take you directly to the backend of your WordPress site. (You might want to make a note of your username and password because you’ll use those on the next screen.)
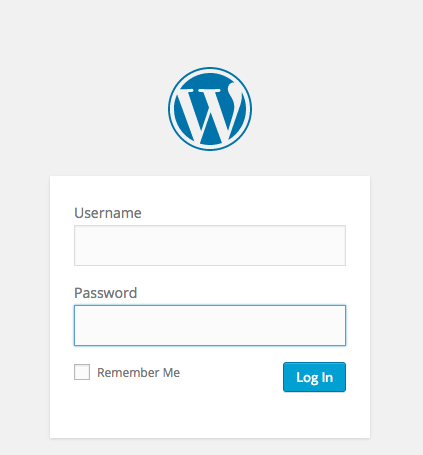
Log in and START BLOGGING! (And then send me the link, because I want to check it out!)
STEP 3: Beautify it.
(Just a note: I hired a developer and designer at the outset for Fabulistas, because I’d worked at larger companies and that’s what we did. I don’t think I’d do the same thing if I was starting out again, though – my site direction changed so much over time that I’ve spent a lot of money tweaking it and redoing things and it still needs a refresh! Instead, I’d install a cool template and wait until I was solid with my blog content before thinking about hiring a team.)
Your WordPress install probably doesn’t look like how you imagined your site in your head. Never fear! There are really great options out there that are user- and mobile-friendly and are as easy to get up and running as pressing “install.”
You’ll notice that as you were installing your WordPress, Blue Host gave you a bunch of templates to look over. I haven’t used any of them (see above), but I spent a little time looking through them and there are some that do all the things I’m currently wishing my site did.
Here are a couple of my faves: Rose Theme, which I think is GORGEOUS, and has those sliders that work well to drive traffic; Erida Theme, which is very minimalistic, but pretty; and Liberty Theme, which feels modern and easy. There are tons of other ones out there, though, if you just google “WordPress Themes” (here are a bunch of cool ones I found easily).
You’ll notice they are all Responsive Themes, which I can’t recommend enough (I would only install a responsive theme, personally). This means no matter what device your readers are looking at your site on, it will fit itself to their screen (it may put the sidebar at the bottom, for example). Way more than half my traffic is from mobile so this is a big deal if you want to give your readers the best possible experience.
The other thing to note with installing a theme is that once it’s up, you can always hire a developer to tweak things for you as you go. I’ve done this to change my Categories so they’re more user-friendly, add social media to the sidebar, etc. It’s a cost-efficient way to get exactly what you want.
And, that’s it! I genuinely would love to see your new blog if you want to leave it in the comments. As well, if you have other questions or things I didn’t cover, leave me a note, and I’ll do my best to answer your questions! GOOD LUCK!!

Which would be overly enthusiastic.
I mean I once told G. Love I was "proud of him" like I was his 80-year old aunt. Decidedly, not cool.
What I'm most enthusiastic about? My emails. They're juicy, relatable, and pick one teensy shift a week to work on together.
CLICK TO TRY MY FREE NEWSLETTER
I'M THE OPPOSITE OF COOL.
Leave a Reply
Download 5 easy ways to amp up your style and wardrobe with barely any effort.
Download 5 easy ways to amp up your style and wardrobe
with barely any effort.


TELL ME WHAT YOU THINK!